Moving the battery to the trunk moves 40 to 50 pounds to the rear right side of the car helping to balance it out. The closer to 50/50 weight distribution the better handling you will get.
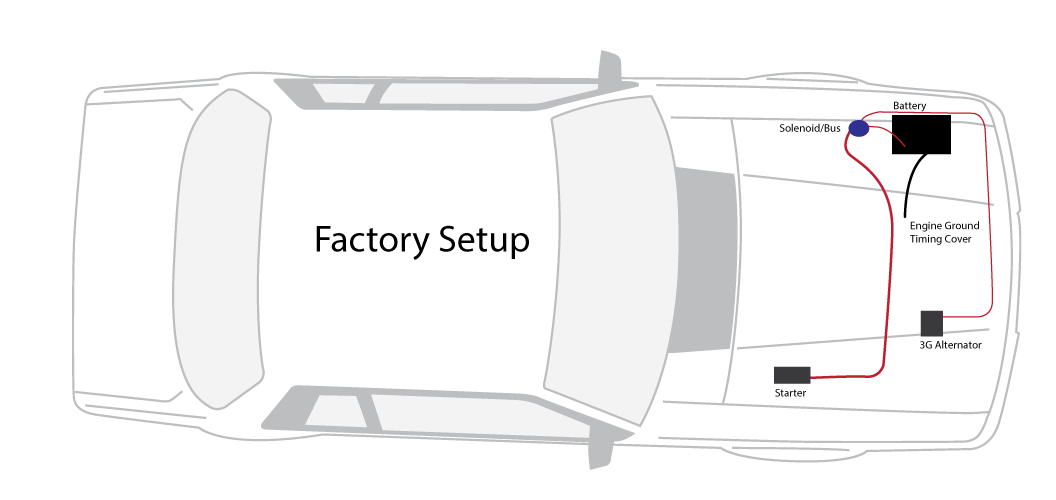
Moving the battery is almost as good as setting the engine back a few inches which could change the weight distribution significantly for such little effort/cost. And if you’re into smoothing and cleaning up the engine bay, a battery relocation is one of those first steps.
One thing to note is you should know why you are doing this. If your Fox body Mustang is used for drag racing or autocross, you should find the general rules and follow those. This article is a general guide and will not replace the NHRA rulebook.
Basic Parts List
- Battery Box
- Rear Ground Cable 1/0 GA (approx.: 24″)
- Engine Ground Cable 1/0 GA (approx.: 24″)
- Power Cable 1/0 GA minimum (approx.: 18ft)
- Two battery terminals large enough for the cable
- Round terminal for EEC ground (yellow)
- Three lug terminals for the cables
- Heat shrink sleeving (with adhesive)
- 3/4″ split wire loom for the power cable (approx.: 25ft)
- Pack of 3/4″ rubber cushioned wire clamps and self tapping screws
If doing a kill switch
- 4 post kill switch such as Moroso 74102
- Extra two lug terminals for cables going to kill switch
- Extra power cable 1/0 GA (approx.: 36″)
- Extra two round terminals for the alternator wires (yellow or blue)
- Approximately 45ft of 12/14GA wire
*Cable and wire length are rough estimates only ~ I wouldn’t trust this lol
Battery Type and Boxes
You could use the stock battery or you could upgrade to an Absorbent Glass Mat (AGM) battery like an Optima as it can be lighter and will not emit as much gas as your standard lead-acid. They say you can “skip the battery box” if you use such a battery however you could still not pass tech at some fussy tracks. It’s best to get a box regardless. You can use the aluminum Taylor battery box #48100 / #48200 or the plastic Moroso #74055 box.
A notchback or convertible Mustang doesn’t afford a lot of room and the box is about the size of a 6 pack of beer, so that limits the beer carrying capabilities of your Fox Body Mustang.
Terminations with Lugs
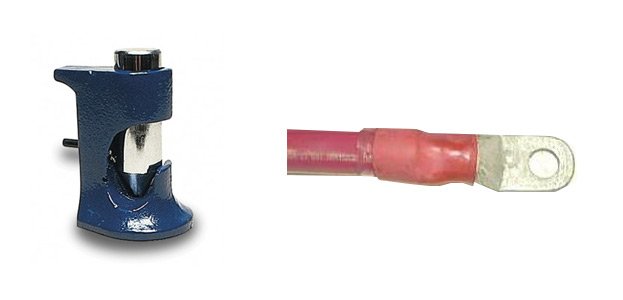
Chances are you will be buying 22 to 25 feet of cable and need to add your own terminals. You could buy the expensive crimping tool or simply get the hammer crimping tool which could be bought for less than $20. Also you need to make the connection as air-tight as possible to help prevent corrosion, do this using heat shrinking tube that has an adhesive inside.
What Wire to Use?
Generally you will find most people use 1/0 gauge (or 1-aught for you nerds) for the positive side and anything above 1GA AWG should be fine unless you need to crank the engine a lot more than average. Overdoing it simply adds weight and a harder to manage cable. Under-doing it causes fires. When in doubt pull it out (the larger cable that is).
Taylor’s battery relocation kit comes with a 1-Gauge cable which would generally be rated at 150 amps while 1/0 would be 170 amps. If you want a monster of a cable, the 4/0 it would be rated at 250 amps. A typical starter will draw from 150 up 250 amps. If you need to crank your engine for 10 minutes for it to start, you may need 4/0 or larger cable… and a tune up. This is oversimplifying things of course.
Welding Cable for Battery Relocation
Welding cables are usually what people use and has more flexibility due to the smaller strands – also be warned that the cable may look “fatter” for the same cross section of copper. The thing to remember that most welding cables have EPDM or Neoprene insulation which isn’t all that resistant to oils and other chemicals which doesn’t make it ideal in an engine bay or running near a leaking transmission or rear main seal, the cable will even swell as it absorbs the chemicals. This isn’t SAE approved either.
The large amounts of strands won’t give it better conductivity either – despite what is said online the “skin effect of current flowing” is nonexistent at 12 volts DC. Welding cables only meet UL-1581 standards. Although this has been done many times, it’s not recommended by some pros.
Battery Cable
SAE approved battery cables generally meet UL-558 and UL-553 flame resistant standards. The most common type of battery cable is SGT as it’s also the cheapest and has the largest strands. A little more solid wire is the SGX battery cable type which uses a better insulation with a higher temp rating, the strands are thinner to compensate for the more rigid insulation. Get the best quality battery cable you can afford for the battery relocation mod.
Grounding
You will want to make a negative battery cable and ensure its solidly attached to the frame rail of the car and again from the front frame rail to the engine. Do NOT use the rear shock bolt to “ground” your Mustang.
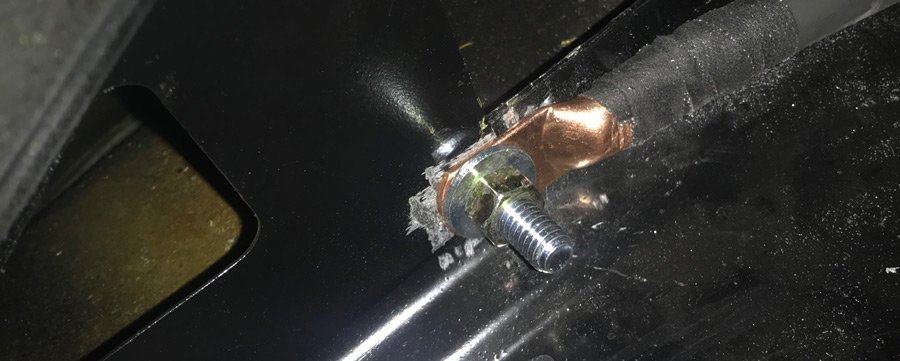
You want to make sure your ground is 100% before continuing because chasing electric issues down the road isn’t fun. The EEC ground (round connector that was on the factory negative cable) can simply be modified with a round terminal and grounded on the apron in the same spot as before.
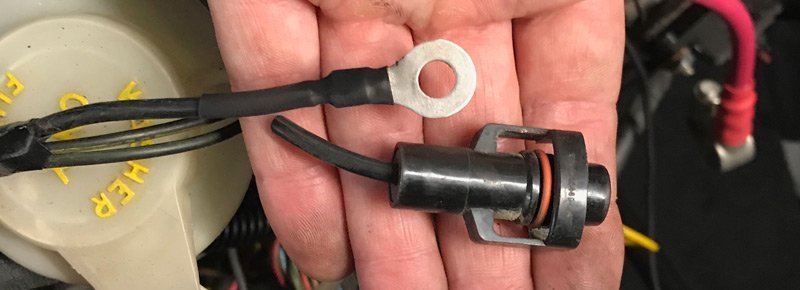
You may be tempted to chase the EEC ground back to the battery but that is not required and could cause issues because if you ground the rear properly the path impedance to the front of the car will be a fraction of the impedance of any wire you could possibly run. The chassis is much more effective.
Wait? Can I put a Fuse?
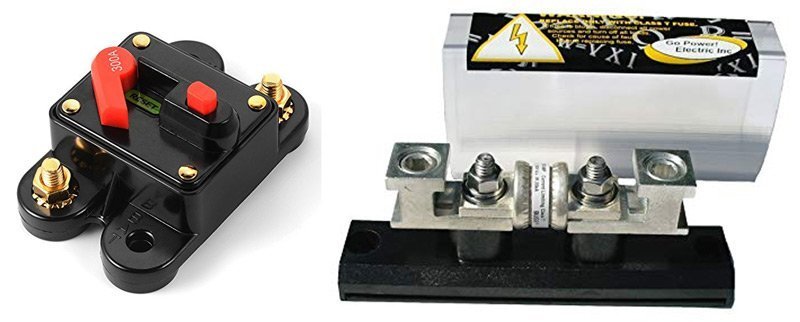
You can, in theory, fuse or add a CB (Circuit Breaker) to the main power cable. Keep in mind that you should carry some spare fuses (or even circuit breaker) if you go this route. The rating is tricky, too high (like above the cable rating) and there will be enough amperage to start a fire, too low and you pop fuses just trying to start the car! For a Fox Mustang with 1/0 cable, I believe I’d start with a 150 to 175amp fuse (and keep spares), If using a fuse, I’d be wise to get a fuse holder that can reach over 300amps and use a smaller fuse.
Running the Power Cable
You will have to use some common sense here because a flaw in your design or engineering can cause a short, a fire and even a battery explosion. Generally you need to make sure to avoid:
- Any moving parts
- Anything that gets hot
- Anything that contains fuel
- Not using any grommets
Outside or Inside?
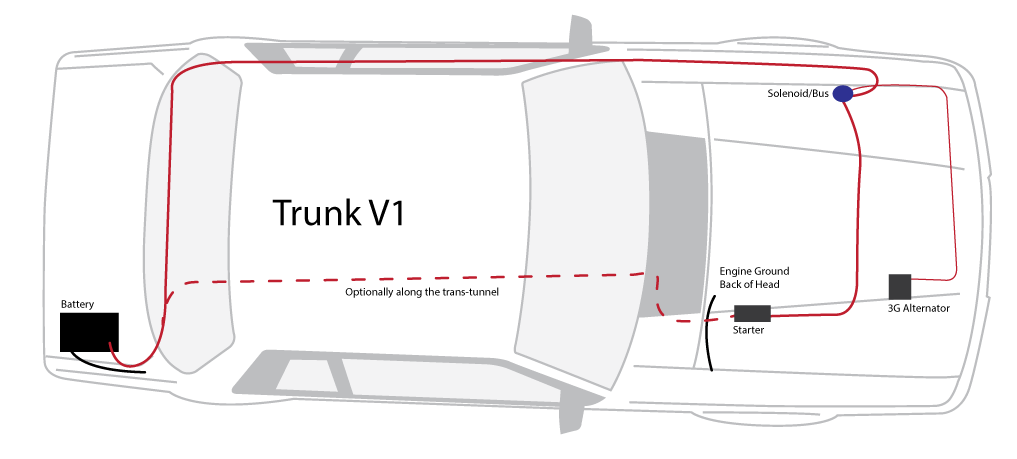
This is an ongoing debate, there no rules around this. Some people prefer to run the power cable under the car, most likely tied to a subframe connector (or run through it). Note that you are subjecting the cable to possible road debris that could damage the insulator and possibly start a fire, not to mention the risk of having to use a jack or 2 post hoist. Also if using welding cable, running it under the chassis could expose it to oil and other chemicals the insulation is NOT designed to handle which will weaken it and eventually cause a short. ~ not good!
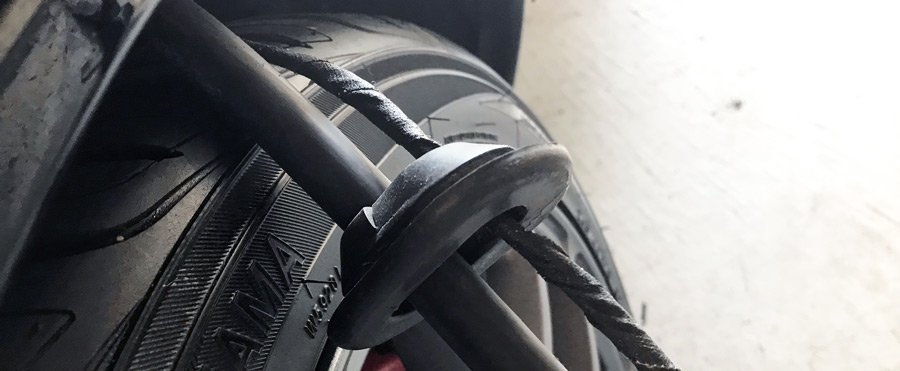
Inside the car, the cable stays out of harm’s way of road debris and any moving parts. Typically run the cable from the battery, to the driver’s side rocker panel and through the firewall into the engine bay which conveniently has a large grommet as pictured below, also with “kill switch” alternator wires.
In the event of a side impact, the last thing you want to think about is if your positive cable shorting and causing a fire. To remedy this point of failure, you could run the cable along the trans tunnel on the inside.
Note: You could also run the power cable on the passenger side and directly to the starter (if you have a mini starter that comes with a solenoid).
Introducing the Extra Paranoid Battery Relocation
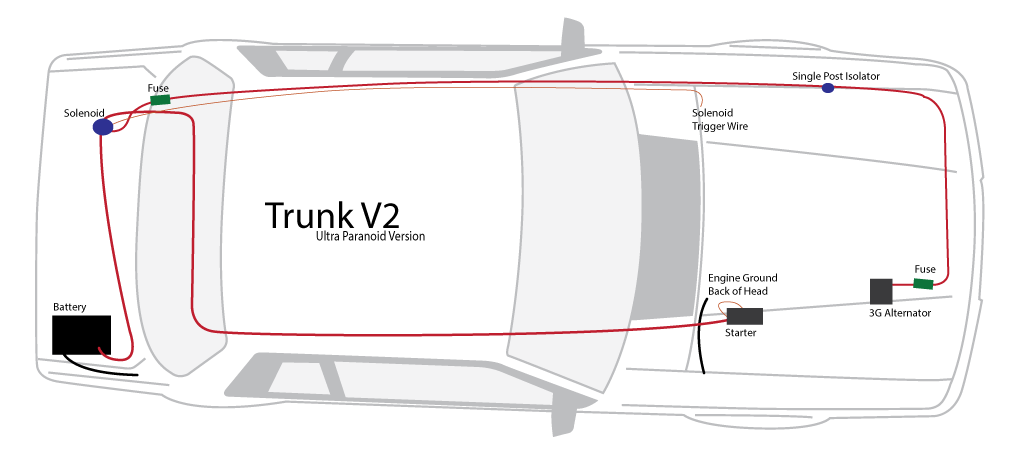
If you are paranoid about this, you could move the solenoid to the trunk (even if you have a mini starter with a solenoid). You need to extend the trigger wire to the trunk and add another power cable for the alternator to the battery which could be fused on both ends (100 to 150 amps). What this does is prevent the large power cable to have electricity when the engine isn’t cranking. To feed the spaghetti of power feeds at the old solenoid location, you could use an isolated post to combine the alternator cable, alternator extension cable and all the chassis power feeds.
Installing the Kill Switch
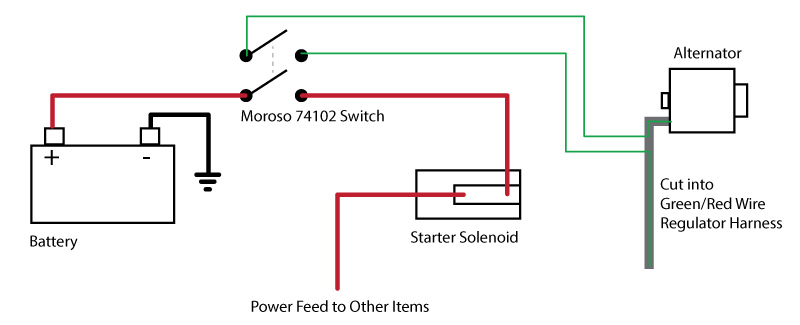
This is going to be a requirement at the track for battery relocated cars. The switch needs to not only cut battery juice to the front but also stop the alternator from keeping the screaming V8 alive! The trick is to interrupt the voltage regulator on the 3G, this is a very reliable method and doesn’t require running more heavy cable to the back of the foxbody. The alternator uses a small current (green wire) to turn the regulator on and make it output voltage. Turn off the power on the (green wire) to the regulator and the alternator shuts down.
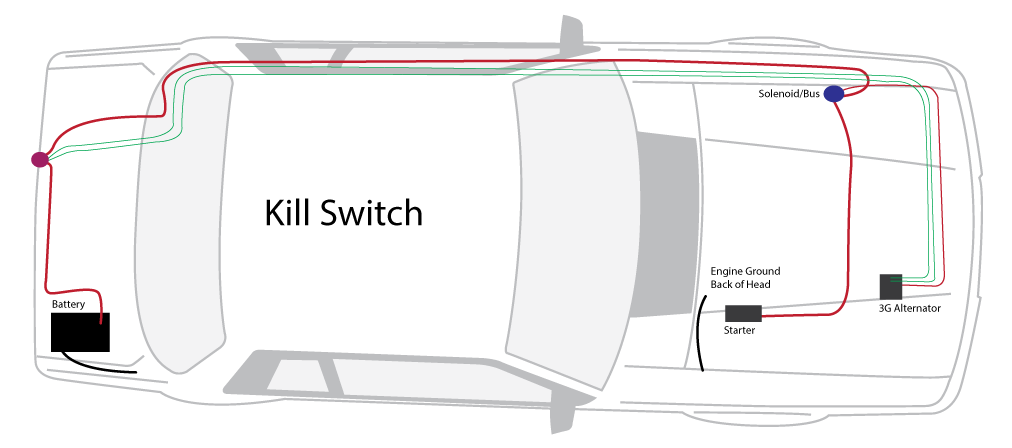
Wiring diagram for installing a Moroso kill switch on the fox Mustang.
Conclusion
That’s about it, feel free to comment below if I omitted some crucial details. Do you use welder cable or dead-set against it… Also do you use a fuse on the large power cable? Share your experiences with the comments below.


its good practice to place the solenoid as close to the battery as possible
this shortens the always “hot” line…like it would be in the front of the car
mine is not…mine is located in the stock location & yes I am using
welding wire to the rear…10 feet of hot wire…however it works
This all seems like overkill for a car that is street legal I mean you put all that effort in a battery relo just to move 50 pounds to the trunk and in the process add like 20 pounds of wiring. real race cars do not have batteries BTW…
But well written article regardless, please make more
very informative write-up. you didnt mention voltage drop. Does it play a role in this setup at all? why was the battery placed in the front of the car from the factory if there are such significant benefits of having it in the rear? Would it have cost more bc of extra wire? or is it more of a safety/liability issue?
First of all, Great Article! Could you possibly include a diagram for remote mounted jumper terminals? I want to put mine under the hood, but I know some racers put them other places.